Background

Tuesday, November 6, 2012

Peppler Night Tables

Happy Tuesday! Halloween is a distant memory, November is well on its way and here the stores have all changed over to their Christmas decors. Crazy. I even saw a few snowflakes yesterday. Gasp!!

Today I'm posting about a pair of night tables I found at the curb. Solid wood. Gorgeous. The only thing wrong with them was that a couple of the legs had come off. In our throwaway society, that's excuse enough to discard something... At least they had the good sense of including the legs...! All that required was a good wood glue. A simple repair that cost pennies.

They might be somewhat old, because the name "Peppler" was branded inside the drawer. A little bit of research revealed that this is a now defunct Canadian high end furniture making company that was established in Hanover, Ontario. I'm not sure, but I believe they may have been bought out by what is now the Sklar-Peppler company. I couldn't find any information to that effect. So, I don't now for sure how old the tables are, but they're really solid and great workmanship.

Dodo head here forgot to take a before pic. Here's one of the drawers anyhoo:


And a view from the bottom, lol! (It's the piece with green tape at the top left of the picture.


 I remembered to take a photo of the handles mid-painting:

Quite gorgeous!


I painted the tables in Annie Sloan French Linen. I painted the handles with ASCP Old White, and also used Old White to dry brush the wood trim on the drawer fronts to accent them and tie in with the handles. After a coat of ASCP Clear Wax all over, I then applied some ASCP dark wax to the wood trim to give them an aged look. No distressing, just solid paint.


 French Linen is such a great, versatile neutral. Love it.


I brought them to Rustic and Refined Interiors and they sold almost right away! It gives me joy to think that somebody likes my work. They like it, they really like it!!


Linking up to:

A Diamond in the Stuff

Furniture Feature Fridays

Tuesday, October 30, 2012

A Labour of Love

First off, I hope everyone on the Eastern seaboard managed to stay safe and dry through the "Frankenstorm". Here in Ontario, we experienced strong winds and lots of power failure, but the electricity did not quit where I live, thankfully.

*******
The reason for the title of this post?

This piece I picked up curb side:
 You really have to see past the yuck factor. And the fact that it's missing two drawer sliders.

You really have to see past the horribly badly done crackling refinish, the chippiness and the the gross colour.

The bland hardware.

 Did I mention the badly done cracking finish?

No, you have to see beyond that. You have to see the nice curves and legs.

And see the final product in your mind's eye.

It took hours of sanding, stripping, resanding, restripping to get the crackling finish off. There is no paint in this world that would have covered the crackling without all the bumpiness showing through. 

I used an eco-friendly stripping liquid which, unfortunately, was not efficient at all. Then I used the Circa 1850 (or is it 1840? Not sure, but I'm not going downstairs to check the can, lol!). This product was a lot better, however, this crackling paint was so thick and sticky, I had to reapply the stripping solution times on numerous spots. A LOT of elbow grease.

I just happened to have three handles I picked up earlier this summer at a garage sale, cause "you never know when you might need them". Well today was the day. They were the right size and I thought they suited the French provincial look a lot better than the original handles.

Finally, the dresser was ready to be painted. I used Annie Sloan Chalk Paint in Paloma. 
What a gorgeous colour!

I spray painted the handles silver.

I stencilled some patterns with Inka Gold gilding wax in Silver and Old Silver on the drawers.

I also applied Silver gilding wax to the edge of the top.

Sorry, I took the pictures at the store and there wasn't a whole lot of natural light. You can't see the full beauty of the Paloma colour. It's a nice, dusty lilac. Love it!

A closer look. Love the "new" handles!

There she is, pretty in Paloma.

(I didn't mention the drawer sliders part. My wonderful hubby helped me with that part. I was lucky enough to find metal sliders at Lee Valley for $4 each. But installing them was quite a challenge! Again, labour of love, I tell ya!)

So, to recap, we went from this:

To this:

Wouldn't it be funny if the people who discarded this piece unknowingly bought it again?


Thursday, October 25, 2012

The Square Round End Table

First off, I'd like to remind you about my giveaway for a free My Memories' digital scrapbooking software package. Click HERE to read all about its amazing features and how to enter. I'm extending it till Monday, so you still have time!

*******

I'm working hard to try and paint all the big pieces in the garage so as to make room, but they appear to be multiplying instead of diminishing, lol! Anybody else has that problem? This is what it looks like:

It ain't pretty behind the scene, folks!

Sooooo, it doesn't seem like my goal of getting the garage empty of all the furniture to be painted before the winter will materialize, so I'm facing another winter of parking outside, lol! First world problems, am I right?

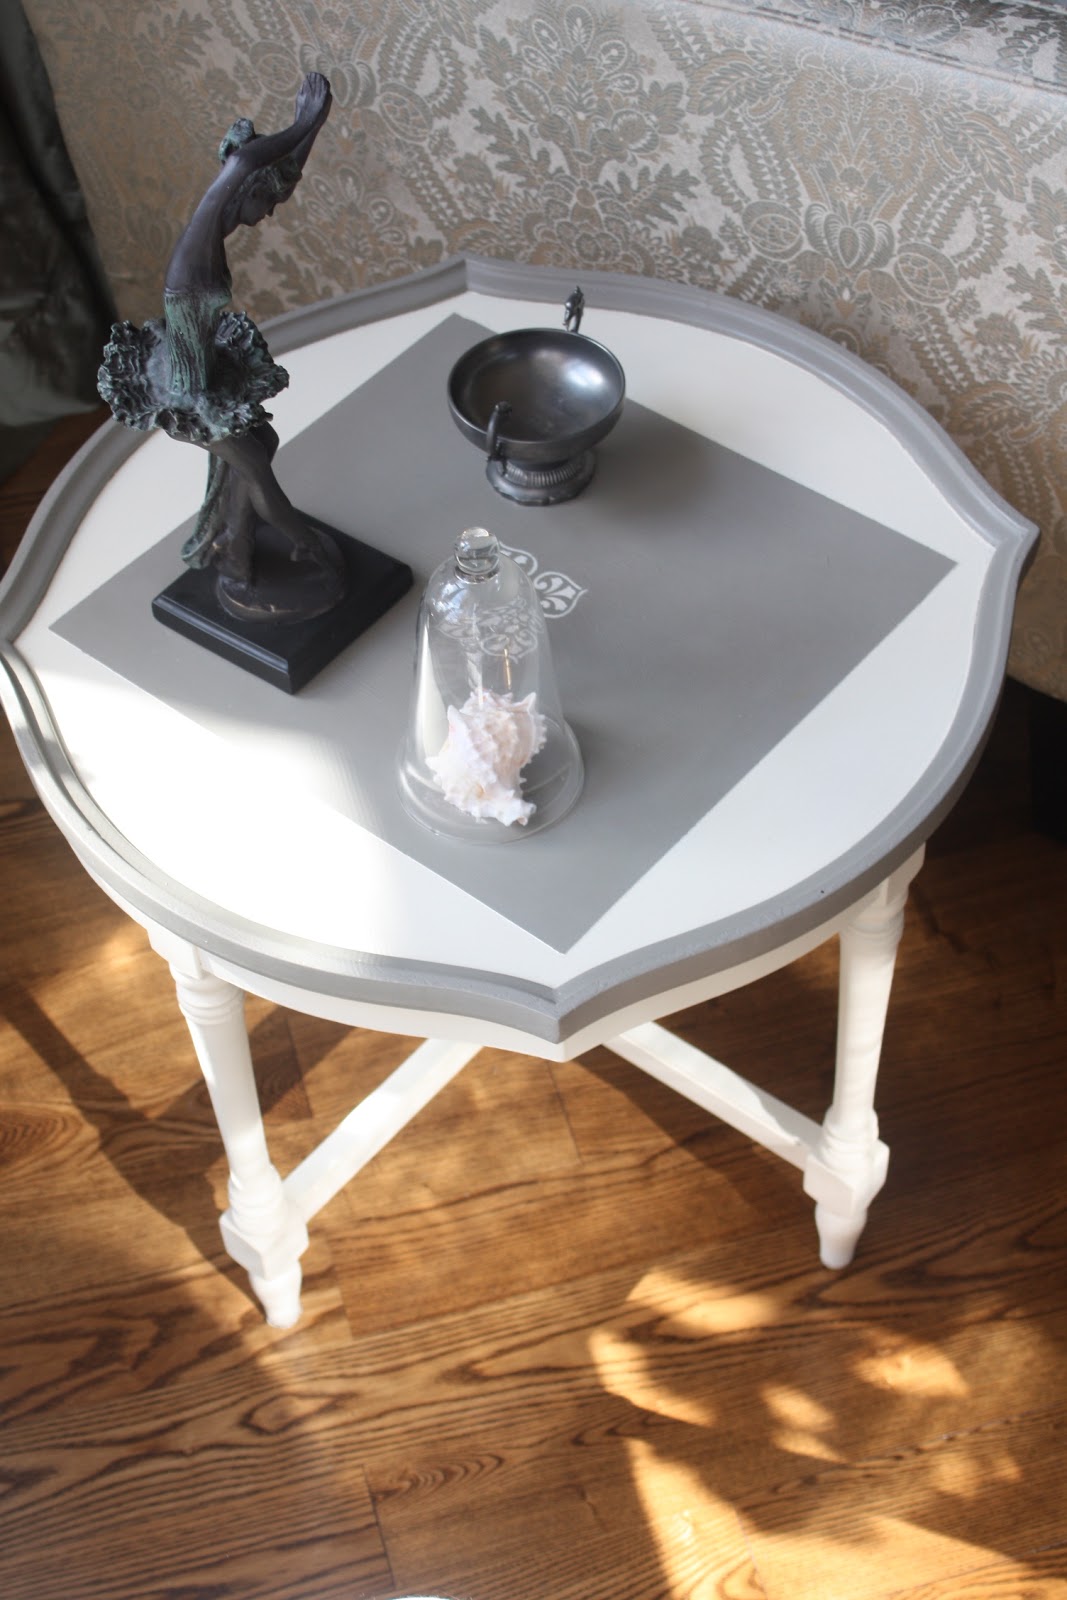
In any case, I did manage to finish a few items that I delivered to Rustic and Refined Interiors this week, one of which was this little table. I found it at a garage sale and I paid a little more than I normally would, but I thought it had really appealing details.

It is both square and round, proving you can be versatile in life!

It has some rough spots.

 (Here is my dog Coco photobombing. Both she and the cat love to do this! 
They're like children, ooooh, Mom's got the camera out! Let's get in the shot!)

I chose French Linen for the top and the rim and Old White for the legs and the stencilling on top. I decided to keep the square on top, so I used Frog Tape to mark it off. Seeing as it is a little bit on the pricey side, I save my Frog Tape for when I need to create neat lines and detailing.


A little stencil detail in the centre for added interest.


I chose not to do any distressing, keeping it neat and clean lined instead.

This table is now at the store, awaiting its new home.

I'm working on a beautiful antique server that was left at the curb. Yes. Left at the curb. Free. Nothing wrong with it, it has beautiful hardware and everything. Wait till you see it!

*******

Linking up to these wonderful parties:


Furniture Feature Fridays


A Diamond in the Stuff

Tuesday, October 23, 2012

What should you do with cupboard door samples?

Well, turn them into art of course!

I found these 5 cupboard door samples by the curb. And right away I knew what I had in mind for them.


I painted them with Annie Sloan Chalk Paint in Old White, then I distressed them and applied clear wax.

Next I printed images from The Graphics Fairy on off-white card stock paper.

The plan was to modge podge them in the centre part of the doors. Well, it was a lot of work locating the middle of the door, then the middle of the images. And with my mediocre limited measuring skills, it meant having to reprint a few of the pictures because they were off centre. 

Okay, finally they were all centered nicely. Next I modge podged the back of the images and glued them on the doors. So far so good. Next, in order to protect them, I modge podged the front of the images with the matte finish modge podge. Well, apparently, you can't do that with ink-jet printed images; it washes off the ink.  ;^(  I had to scrape them off the doors.

So, I went back, reprinted the images and this time I sprayed them with a canvas protector, also in a matte finish. Reglued them on the doors. Let everything dry thoroughly and then went over them with a thin layer of modge podge. Success!

Hubby and I then installed some hooks on the back and here they are, ready to grace someone's kitchen or dining room:


Yes I know, there are two doors with identical teapots. It's a mistake, folks. One of them was supposed to be 3 adorable teacups. But with all the measuring and gluing mistakes, I lost track of what I reprinted and that's how I ended up with two teapots. I'm kind of a klutz that way. Oh. Well. I'm okay with it. :^)


My husband really likes the way they turned out and thinks I'm on to something. Unfortunately, they're one of a kind, because I don't know where I can find an infinite supply of cupboard door samples. For free. The curb is a fickle mistress, my friends. She doesn't offer the same thing twice.

Too bad, because I really learned from all those mistakes and now I'm a real pro at this!

*******

Don't forget to enter my giveaway for a free My Memories digital scrapbooking software package, only 3 more days to go!

*******

Linking up to:

A Diamond in the Stuff


Feathered Nest Friday at French Country Cottage